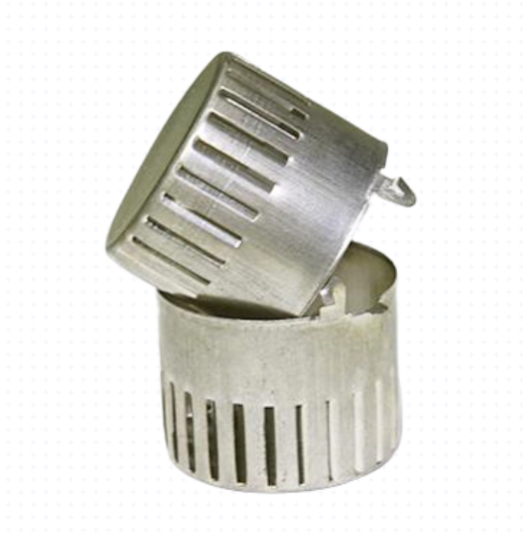
Summary
A deep drawn housing can hold two of its three dimensions predictably: either the outer diameter plus the wall, or the inner diameter plus the wall. The dimension you do not hold will float, and it should be the one that does no locating or sealing work in the assembly. The wall itself has to be called out on the drawing, because a tight ID and a tight OD already imply a wall tolerance equal to the sum of the two diameter half-bands.
The Short Answer: Two of the Three Dimensions Are Yours to Choose
A deep drawn housing cannot hold a tight inner diameter, a tight outer diameter and a tight wall at the same time. Those three features are one geometric system, not three independent callouts. The outer diameter is produced by the last die bore, the inner diameter by the punch that runs inside it, and the wall is whatever the material does in the gap between them. A drawing that asks for two tight diameters has asked for a tight wall, whether or not it says so.
The decision reduces to one question. In the assembly, which surface does the work? If the housing is pressed into a bore, clamped on its outside or welded at a flange, hold the outer diameter and the wall, and let the inner diameter run loose within a generous band. If a piston, spool, insert, sensor element or O-ring lands on the inside, hold the inner diameter and the wall, and let the outer diameter float. Trying to hold all three does not remove the problem, it moves it into the press, where it reappears as die wear, rejects and repeated tool adjustment.
Why ID and OD Are Not Independent Variables on a Drawn Cup
In a drawn cup, the punch diameter sets the inside, the die bore sets the outside, and the sheet thickness sets the difference between them. If the incoming strip is 0.1 mm thicker than nominal, the wall is thicker and the outer diameter grows unless the die squeezes it back, which is exactly what ironing does when wall thickness is a controlled feature rather than a by-product of the draw.
Once a part goes through more than one draw, wall material is redistributed again at every stage. Each redraw pulls metal from the flange and the sidewall, so wall thickness at the bottom radius, at mid-wall and at the mouth are three different numbers until the sequence settles. That is the mechanism behind a common surprise: the first draw looks correct, the third draw is outside tolerance, and nothing in the tool was changed between them. The stage-by-stage draw sequence is therefore part of the tolerance discussion, not a separate subject.
There is field evidence for how quietly this goes wrong. On a production housing, the thickest and thinnest sections of wall differed by 0.2 mm on a drawing that carried no wall-deviation callout at all, because the drawing had dimensioned the diameters and assumed the wall would look after itself. Nothing was out of tolerance on paper. The part simply was not the part that had been drawn.
The Arithmetic: Two ±0.05 mm Diameters Implicitly Specify a ±0.05 mm Wall
The relationship is worth working through by hand once, because it is the whole argument in five lines. Take a housing with a nominal wall of 0.5 mm, an outer diameter of Ø10.00 ±0.05 mm and an inner diameter of Ø9.00 ±0.05 mm, so the nominal wall is (10.00 − 9.00) / 2 = 0.50 mm. Now let each diameter go to the limit that makes the wall worst.
- Thickest wall: outer diameter at its high limit and inner diameter at its low limit gives (10.05 − 8.95) / 2 = 0.55 mm.
- Thinnest wall: outer diameter at its low limit and inner diameter at its high limit gives (9.95 − 9.05) / 2 = 0.45 mm.
The implied wall band is 0.45 to 0.55 mm, a total spread of 0.10 mm, which is ±0.05 mm about the 0.50 mm nominal. The two diameter half-bands simply add: 0.05 + 0.05 = 0.10 mm of wall movement. On a 0.5 mm wall, ±0.05 mm is ±10 percent of the wall thickness, and it has to hold at every point around the circumference and along the full drawn length. Few drawn housings reach that without ironing, a sizing station, or both.
The arithmetic also runs backwards, which is the more useful direction. If the application genuinely needs a wall of 0.50 ±0.10 mm, then the two diameter half-bands together may not exceed 0.20 mm: for example OD ±0.15 mm with ID ±0.05 mm, or OD ±0.10 mm with ID ±0.10 mm. Publishing that budget before the drawing is released prevents the classic first-article argument, in which every dimension is individually defensible and the assembly still does not fit.
What Holding Each Dimension Costs You
The three features are not equally hard to control and they do not do the same job in an assembly. The matrix below is the form we use when a drawing arrives with three tight callouts and no indication of which one is functional.
| Feature | How it is produced | What holding it tight requires | Typical assembly role | Position on the drawing |
|---|---|---|---|---|
| Outer diameter (OD) | Last die bore, or a sizing / coining pass after drawing | Hard die bore held in a narrow band, with wear monitored between grinds | Locating in a housing bore, press fit, clamping, welding fixture | Usually the datum. Hold it. |
| Inner diameter (ID) | Punch diameter; wall thickness determines the rest | Punch maintained and replaced before wear reaches the band; often a separate sizing pass | Piston or insert fit, spool bore, sensor element seat, O-ring groove | Hold only if the inside does the locating |
| Wall thickness | The material between punch and die, set by blank thickness, redraw sequence and ironing | Ironing or sizing station, tighter incoming strip control, heat treatment planned into the sequence | Magnetic path, pressure containment, weight, stiffness, buckling resistance | Must be called out explicitly, never left implied by ID and OD |
Read the middle column as a map of where the effort lands. Holding OD tight is a tool-making and tool-maintenance task. Holding ID tight is a punch-and-wall task, and it drags the wall with it. Holding wall tight is a metal-movement task, the hardest of the three.
The Decision Rule: Hold Two, Let One Float
Hold the outer diameter when the outside does the work
This is the common case for a housing pressed into a bore, clamped in a fixture or welded at a flange. Dimension the OD in a tight band, dimension the wall or the wall deviation to protect the magnetic or structural requirement, and mark the ID as reference. Letting the ID float is not sloppiness. It is an acknowledgement that the punch runs inside the die bore and that the difference between them is the wall.
Hold the inner diameter when the inside does the work
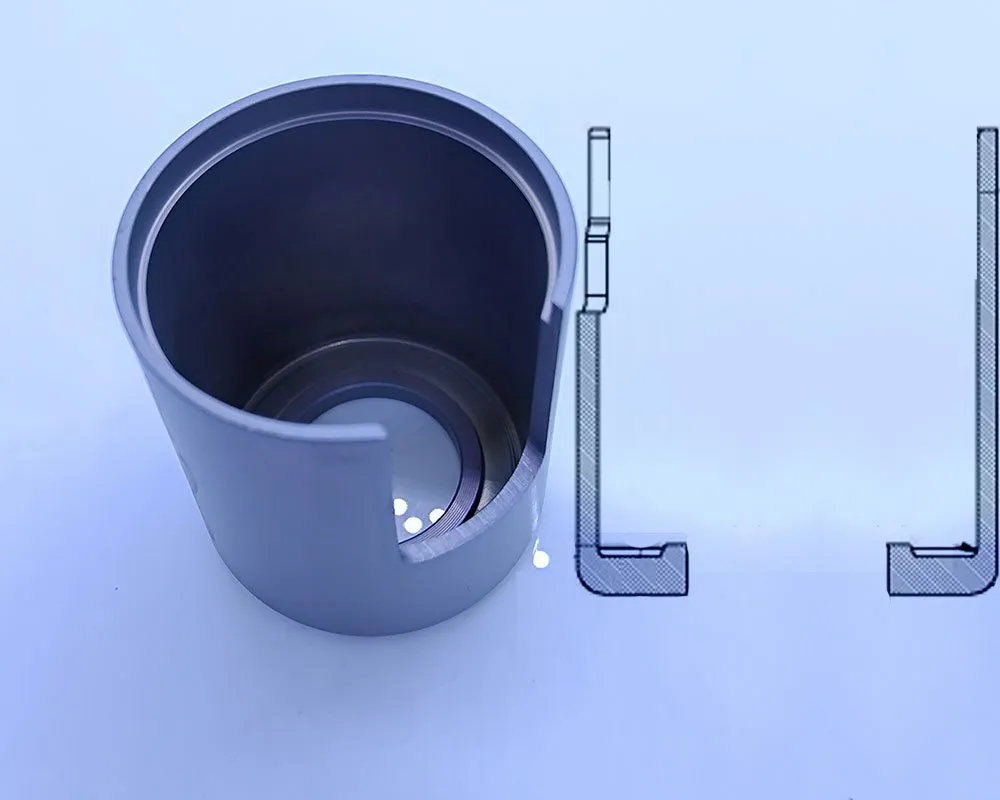
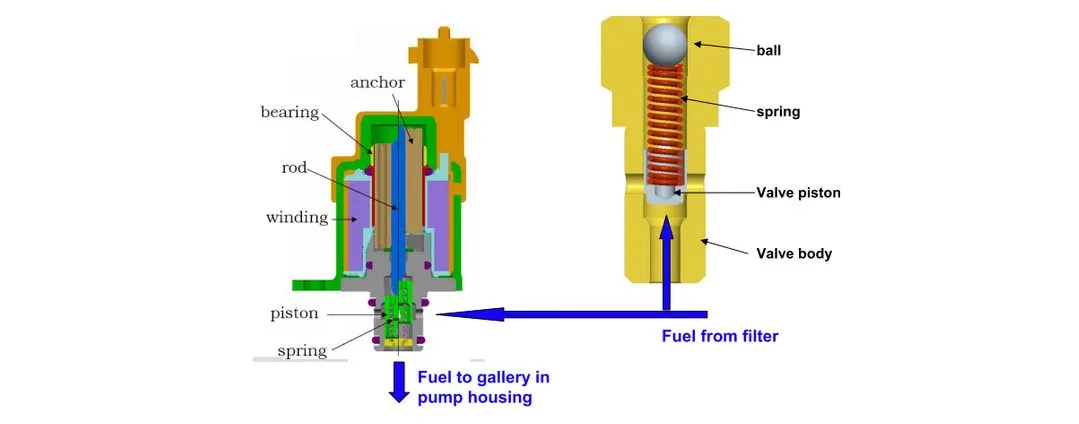
This applies when a piston, a valve spool, a sensor element or a seal lands on the bore. Hold the ID and the wall, and let the OD float in a wider band. The tooling consequence is real: punch wear now shows up directly in a functional dimension, so punch replacement intervals have to be planned rather than reactive. A solenoid valve housing with a spool bore is a good example of a part where the inside is the feature that matters, and where a concentric but loose outside diameter is entirely acceptable.
Concentricity is not separately negotiable after that choice. If the OD is the held diameter, concentricity becomes a statement about how well the punch is centred in the die bore, an alignment issue with a small and measurable error budget. If the ID is held, concentricity and wall are the same conversation viewed from two directions.
Four questions settle the choice on most housings:
- Which surface touches the mating part, the outside of the housing or the inside?
- Which surface carries the seal, the press fit or the weld?
- If the loose dimension drifts by 0.15 mm, does anything stop working, or does the part simply need more clearance?
- Which dimension will inspection actually check on the shop floor, and can it be reached on a CMM without sectioning the part?
What Actually Moves Wall Thickness
Wall variation is not random. In practice it tracks a short list of specific causes, each with a countermeasure that can be designed in before the tool is cut.
| Mechanism | What happens to the wall | Countermeasure |
|---|---|---|
| Mouth step or relief punched instead of machined | Punching the step loads the die edge, accelerates local die wear, and the wall drifts as the tool wears | Machine the step, or use a replaceable insert and monitor the step feature at every grind |
| Post-draw heat treatment | Stress relief and annealing relax the drawn wall and move both diameters; 0.05–0.1 mm of deformation afterwards is a realistic planning figure | Place heat treatment before final sizing, and split machining into two passes so heat treatment does not stack onto concentricity error |
| Number of redraw stages | Each redraw redistributes wall, so mid-wall and mouth thicknesses differ from the first-draw values | Set the sequence from the finished wall requirement, confirm it with a drawn trial, and add a sizing / coining station at the end |
| Incoming strip thickness variation | Nominal thickness tolerance enters the wall directly; a ±0.12 mm strip band on 1.2 mm material is wider than many dimensional tolerances on the part | Treat material thickness tolerance as its own line on the drawing and buy strip to a tighter band for wall-critical parts |
| Plating or coating after drawing | Deposited thickness consumes part of the dimensional budget on whichever surface is coated | Decide which surface is coated, and whether the coating sits inside or outside the tolerance budget, before the drawing is frozen |
The first row is the one that catches shops out. A mouth step that is punched rather than machined looks like a saving at the tool-design stage, but the punch forming it wears quickly and the wall near the mouth drifts with it. We have seen the same problem fixed in both directions on different parts, one geometry moved from machining to punching and another from punching to machining, which is why the decision should follow the wear mode rather than a house rule. The background sits in stamping die design, where insert material and coating choices decide how fast that wear arrives.
Concentricity and Perpendicularity Travel Together
Two more numbers belong in the same conversation, because they move with the wall. After post-draw heat treatment, concentricity drift between the inner and outer diameter of 0.05–0.1 mm is normal and should be planned for rather than argued about afterwards. Errors attributable to the carbide die itself are much smaller, on the order of 0.01–0.02 mm on the outer diameter, which shows where the leverage actually sits: the thermal and sizing sequence dominates, not the initial precision of the die.
Perpendicularity behaves the same way. A shop comparing its process against an automotive benchmark typically finds that concentricity and perpendicularity both have to be relaxed relative to that benchmark, while the diameters themselves remain achievable. A drawing that specifies a tight perpendicularity at the mouth and a tight concentricity over the full length, without a sizing operation after any thermal step, is asking the sequence to do something it cannot do, and the mismatch will surface as a rejected lot rather than a rejected drawing.
The Release Rule: Measure 10 Before You Run 150
Once the sequence is set, the first production run is where wall and concentricity either hold or do not. The rule that works is to CMM-verify 10 consecutive pieces and read the full report before releasing the balance of a 150-piece lot. Ten pieces is enough to see the spread and the direction of drift on a stable process. A single first-off sample shows neither, and a completed lot shows both too late.
Three process changes routinely come out of that check:
- Split a machining operation into two passes, so heat treatment sits between them and does not stack its distortion on top of the concentricity error of an already-finished surface.
- Add a sizing or coining station at the end of the sequence, after any thermal operation, to bring the held diameter and the wall back inside the band.
- Move a mouth step from punching to machining, or the reverse, if wear data from the first run shows that the step is driving the wall drift.
Each of these changes alters the tool, so they are worth planning for in the first tool rather than discovering during a production run. A sizing station also only helps if the feature it controls appears on the inspection plan with a defined measurement position.
What the Drawing Must Carry, and What You Can Give Back
The single most valuable line on a drawn housing drawing is the wall callout, and it is the line most often missing. If the drawing gives a tight ID and a tight OD and no wall requirement, the shop is left to guess which of the three the designer cares about, and the guess is usually settled by whoever happens to inspect the part.
Drawing note you can paste in: WALL THICKNESS 0.50 ±0.08 mm, verified as (OD − ID) / 2 at three axial planes. OUTER DIAMETER Ø10.00 ±0.05 mm (datum). INNER DIAMETER Ø9.00 mm REFERENCE. CONCENTRICITY 0.10 mm. PERPENDICULARITY 0.10 mm. GENERAL DIMENSIONS ±0.25 mm.
The bands behind that note are the ones that hold in production: general dimensions on a drawn or stamped part at ±0.25 mm, tight drawn dimensions at ±0.05 mm, and anything closer than that handled by sizing or coining, where ±0.02 mm on a coined feature is achievable but carries less confidence and needs a capability study on the actual part. Material thickness is a separate band and should never be folded into the dimensional tolerance, because a strip supplied to ±0.12 mm on 1.2 mm nominal will consume a meaningful share of any wall budget before the press starts.
There is also a trade to make. Tolerance is not free, and tightening one dimension is paid for by loosening another. A non-functional outside diameter, a clearance diameter or an internal relief can be opened from ±0.05 mm to ±0.15 mm or to general tolerance, and that slack is what makes the critical feature achievable. The engineering drawing guide covers how to mark those dimensions so the shop does not have to interpret intent.
Two documents are worth requesting with the first article: a full dimensional report showing the wall and both diameters on one sheet, and a capability statement describing the band the process held across the run rather than only on the submitted sample. Both belong to the same evidence set that quality documentation is built on.
Where the limits sit depends on the part. Material, wall, depth ratio and the number of draws all move the achievable band, and a 0.5 mm wall in stainless steel behaves differently from the same wall in deep drawing quality steel. The honest position is that a drawn housing can hold two of its three diameters well, and that the third needs to be named as the loose one on the drawing rather than left to be discovered. If you can say which feature does the locating or sealing, the tolerance stack can be allocated in the right order, and the capability boundaries we publish describe where those limits fall.
Related reading on deep drawn stamping
These companion notes go deeper on the same engineering decisions:
- Tightening a Tolerance: What It Costs in Tooling
- Deep Drawn Stainless Steel Cracking: A Root-Cause Ladder
- Plating a Deep Drawn Housing: Thickness vs the Tolerance Budget
- The Deep Drawing DFM Checklist Before Cutting Steel
FAQ: FAQ: Deep Drawn Housing Wall Thickness Tolerance
Q: Can a deep drawn housing hold a tight ID and a tight OD at the same time?
A: Not usefully. The wall is the difference between the two diameters, so two tight diameter tolerances add into the wall band. On a 0.5 mm wall, ±0.05 mm on the OD plus ±0.05 mm on the ID is 0.10 mm of wall movement, which is ±10 percent of nominal. Choose the diameter that does the locating or sealing work, hold that one plus the wall, and let the third dimension float in a wider band.
Q: How do I convert a wall tolerance into diameter tolerances?
A: Add the two diameter half-bands and you have the total wall spread. For a wall of 0.50 ±0.08 mm the total spread is 0.16 mm, so the OD and ID half-bands together may not exceed 0.16 mm, for example OD ±0.05 mm with ID ±0.11 mm, or OD ±0.08 mm with ID ±0.08 mm. Put the tighter share on whichever diameter is functional and let the other one carry the slack.
Q: Does post-draw heat treatment change the wall and the concentricity?
A: Yes, and it is often the largest single contributor. Concentricity drift of 0.05–0.1 mm after heat treatment is a realistic planning figure, while errors traceable to the carbide die itself are typically only 0.01–0.02 mm on the outer diameter. The remedy is sequence, not tighter tooling: place heat treatment before final sizing, and split machining into two passes so thermal distortion does not stack onto the concentricity error of a finished surface.
Q: What should I write on the drawing if only one diameter really matters?
A: Name the held diameter as a datum with its tight band, give the wall or wall deviation as an explicit requirement, and mark the loose diameter as reference. A workable note reads: WALL THICKNESS 0.50 ±0.08 mm, verified as (OD − ID) / 2 at three axial planes; OUTER DIAMETER Ø10.00 ±0.05 mm (datum); INNER DIAMETER Ø9.00 mm REFERENCE; GENERAL DIMENSIONS ±0.25 mm. Without the wall line, the wall tolerance is implied and nobody agrees on what it is.
Q: How many pieces should be measured before releasing a production lot?
A: Measure 10 consecutive pieces on a CMM and read the full report before releasing the balance of a 150-piece lot. Ten pieces show the spread and the direction of drift on a stable process, which a single first-off sample cannot, and they show it while there is still time to correct the tool or the sequence rather than after the lot is complete.
Q: Can sizing or coining hold a tighter wall than drawing alone?
A: Yes. A sizing or coining station at the end of the sequence, placed after any thermal operation, can pull the held diameter and the wall back into a band that drawing alone will not hold. Bands around ±0.02 mm on a coined feature are achievable, but they depend on the specific geometry and need a capability study rather than an assumption, and the station adds tool maintenance over the life of the program.
Q: Why does perpendicularity have to be relaxed along with concentricity?
A: The two errors come from the same sources: die and punch alignment, wall variation around the circumference, and distortion introduced by heat treatment. A drawn housing that is out of concentricity is usually also tilted at the mouth relative to its own axis. Compared with an automotive benchmark, both concentricity and perpendicularity typically need to be relaxed, while the diameters themselves remain achievable.